vector removal using primer sequences (if option is checked)
Step 1. Choosing the task you want to perform
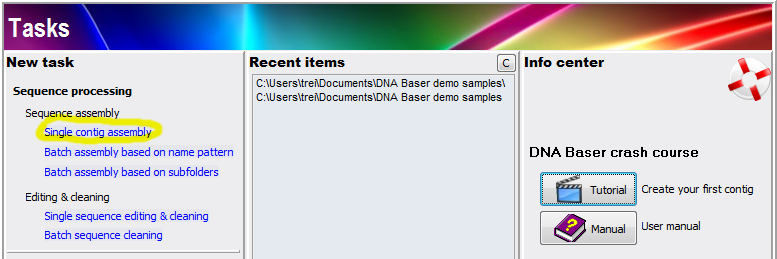
Run DNA Baser by clicking its icon on your desktop. The Tasks window should be open by default. Tasks is the central point from you access all DNA Baser functions.
We want to assemble some files so we will click the 'Single contig assembly':
This will open the Project Manager. Project Manager is the window from which you choose the input files, assembly parameters and start the task.
Step 2. Importing the input files
In Project Manager, use the Sample Explorer to navigate to the folder where your samples are located. For your convenience we delivered two demo SCF chromatograms (shown in the image below) in DNA Baser package, a reference file and some vectors.
DNA Baser will assemble ALL files in the Job List. Therefore, we need to add SequenceA.scf and SequenceB.scf into the Job List. There are multiple ways to do this:
use the single arrow button to add the file(s) selected in Sample Explorer to the Job List.
use the double arrow button to add all files in Sample Explorer to the Job List.
use the mouse to drag and drop files from Sample Explorer into the Job List.
If you want to remove files from the Job List, use the button or press the Delete key.
Note: It is necessary to change these parameters ONLY if you have low quality samples and DNA Baser cannot assemble them. Otherwise use the default settings.
Other optional steps:
In the Vector removal tab select the primers you want to use for the removal of contaminant vector sequences. For your convenience, there are several primer sequences already enter into the program
In the 'Assemble to reference' enter a reference file. (This is done in a separate tutorial)
Step 4. Project name (optional)
In the 'Project name' collapsible panel (see image above), choose a name for the current project so you can easily identify it later.
This step is optional as DNA Baser will automatically choose a name for your project if 'Auto generate project name' is checked:
Step 5. Assembling the samples
To start the assembly process, press the Start sequence assembly button. During assembly, DNA Sequence Assembler will:
automatically detect and trim low quality regions of your samples
automatically trim vector sequences
automatically correct the ambiguities in your contig
automatically save the project and the contig to disk
Step 6. Inspecting the assembly
DNA Baser should assemble the demo SCF files provided in less than 0.1 seconds. When done, it should display the assembly in a new Assembly window.
In this window, you will see the alignment of the input sequences, the corresponding chromatograms, the contig and the contig map. You can also edit the contig:
Step 7. Analyzing the log
Upon completion the program will automatically switch to the Log tab. The Log shows:
Information about the quality of the input files
Total number of successfully assembled input files
Information about the unassembled samples (and reason why)
Number of bases left after automatic end trimming
Parameters used to assemble the samples
Contig data:
Total number of contigs
Contig length before/after vector removal
Number contig mismatches/ambiguities
Mismatch ratio
Possible errors and warning (The errors are shown in red color; warnings in orange)
The process is identical if you want to assemble other types of samples (ABI, FASTA, SEQ, etc).
Almost everything is configurable in DNA Baser (what to save, which windows to automatically open, chromatogram color, etc). Don't be afraid to experiment.
The program will show an explicit warning if you try to assemble less than two files.
DNA Baser will automatically remove invalid samples from the Job List.
Different file types (SCF, ABI, FASTA, SEQ, etc) can be mixed (assembled) together.
When you are in doubt, check the Log. DNA Baser outputs valuable information about the assembly process. Hint: set the log to 'Verbose' mode to see more info.
You don't have to manually save the contig to disk. It will be saved automatically be DNA Baser. The log and the project CAN be also automatically saved to disk.