|
BATCH ASSEMBLY BY PLATE
PREVIEW

The news
We are developing a new module for DNA Baser.
Description
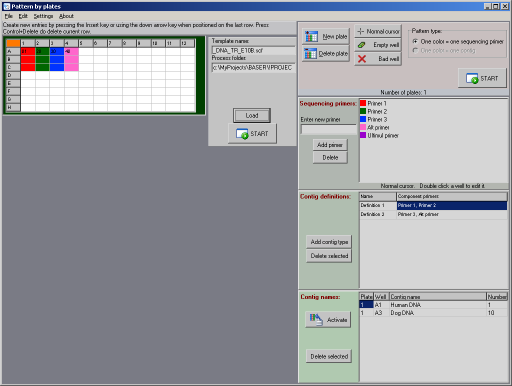
This tool will help you to batch-assemble your files based on the way you place the primers on your plates. Use colors to mark the wells that contain the same primer. The tool will generate
the list of samples belonging to the same contig and will copy/move those samples in the same folder.
In the final version, this list will be automatically sent to DNA Baser, which will start the batch assembly
process.
Concept
Paint the wells that belong to
different primers with different colors (one color per primer), and the software will calculate the pattern for you.
Download
| Name |
| Version |
1.1.10 (beta) |
| Version date |
16 Sept 2009 |
| Package size |
~0.5 MB |
| |
The program will automatically load a file called 'demo_project.plt' if it exists. This file
is a demo project. You can delete this file and create your own projects.
Price
Proposed price is $99. However, for the moment, the program is freeware.
How to use the program

Click to enlarge
MANUAL

Click to enlarge
Starting the program
When the program starts for the first time, it will automatically create an empty plate for you.
If you already used a project before, it will load that project (last used project).
You can press the 'Nile->New project' menu item to drop the existing information and to create a new blank project.
Adding primers to the plate
Let us suppose that your contig is defined as being composed from 'Primer1' and 'Primer2'.
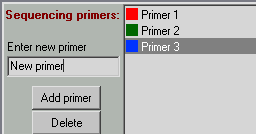
Add these two primers in the 'Sequencing primers' box. You can add also any dummy text/primers since this box is not fully functional.

After you added these 2 primers click on the first one. Your cursor should change in a brush. Mark with that primer few wells in the plate. Do the same with the second primer.
Input names
Double click the first well and add the name of the sample corresponding to that well. The program will automatically generate the names for the rest of the wells so you do not have to manually input the entire name, but only the first one.
By default, the program will look for samples in a folder
called 'samples'. We provided some empty (dummy) files as SCF samples in that folder.
Note: not all files provided in the ‘samples’ folder are used in this demonstration. Unused files will be ignored.
The first file provided by us is called ‘01_DNA.scf’ so you will insert only the number ‘01’ in the first well. The program will automatically
attach the rest of the name (_DNA.scf).
Defining a contig
You must instruct your program from which primers your contigs are made off:
drag the first primer from 'Sequencing primers' box into the first (empty) row of ‘Contig definition’ box. Drag the second primer on the same row. Now the ‘Contig definition’ box
should look like this:

Providing a name for the resulting contig
Next step is to tell the program how to name the resulting contigs. Click the ‘Activate’ button in the ‘Contig names’ box. The box will change its color to indicate
that it is ready to receive input. You can manually add input in this box by typing the coordinate of a well or by clicking that well (last method is recommended).
In our case, you should click on the first well. The coordinates of this well will be added in the ‘Contig names’ box. All you have to do is to complete the rest of the fields
(a name and a number).
When you are done, click the button again to finish.
Last step
After we provided all the minimum input data, we can finally start the file separation process. Press the ‘START’ button.
First the program will check all input data is ok. Then it will generate the missing information, for the cells where you didn't provided manual input.
Lastly it will copy the sample files from the ‘samples’ folder into the ‘Samples output’ folder and will arrange them by contigs from which they belong.
A file called ‘New definition 1.bba’ will be saved in that folder also. You can open this file with a text editor like Notepad or Word.

Attention: the program will delete the content of ‘Samples output’ folder before starting the file separation process. Do not store personal files in that folder because it will be deleted!
[BT home]
Please feel free to download this new module, take a look at it and send feedback:
- do you think it is useful
- its interface is too complex?
- how difficult is to use it?
- do you have any suggestions?
|

